Váš košík je prázdný


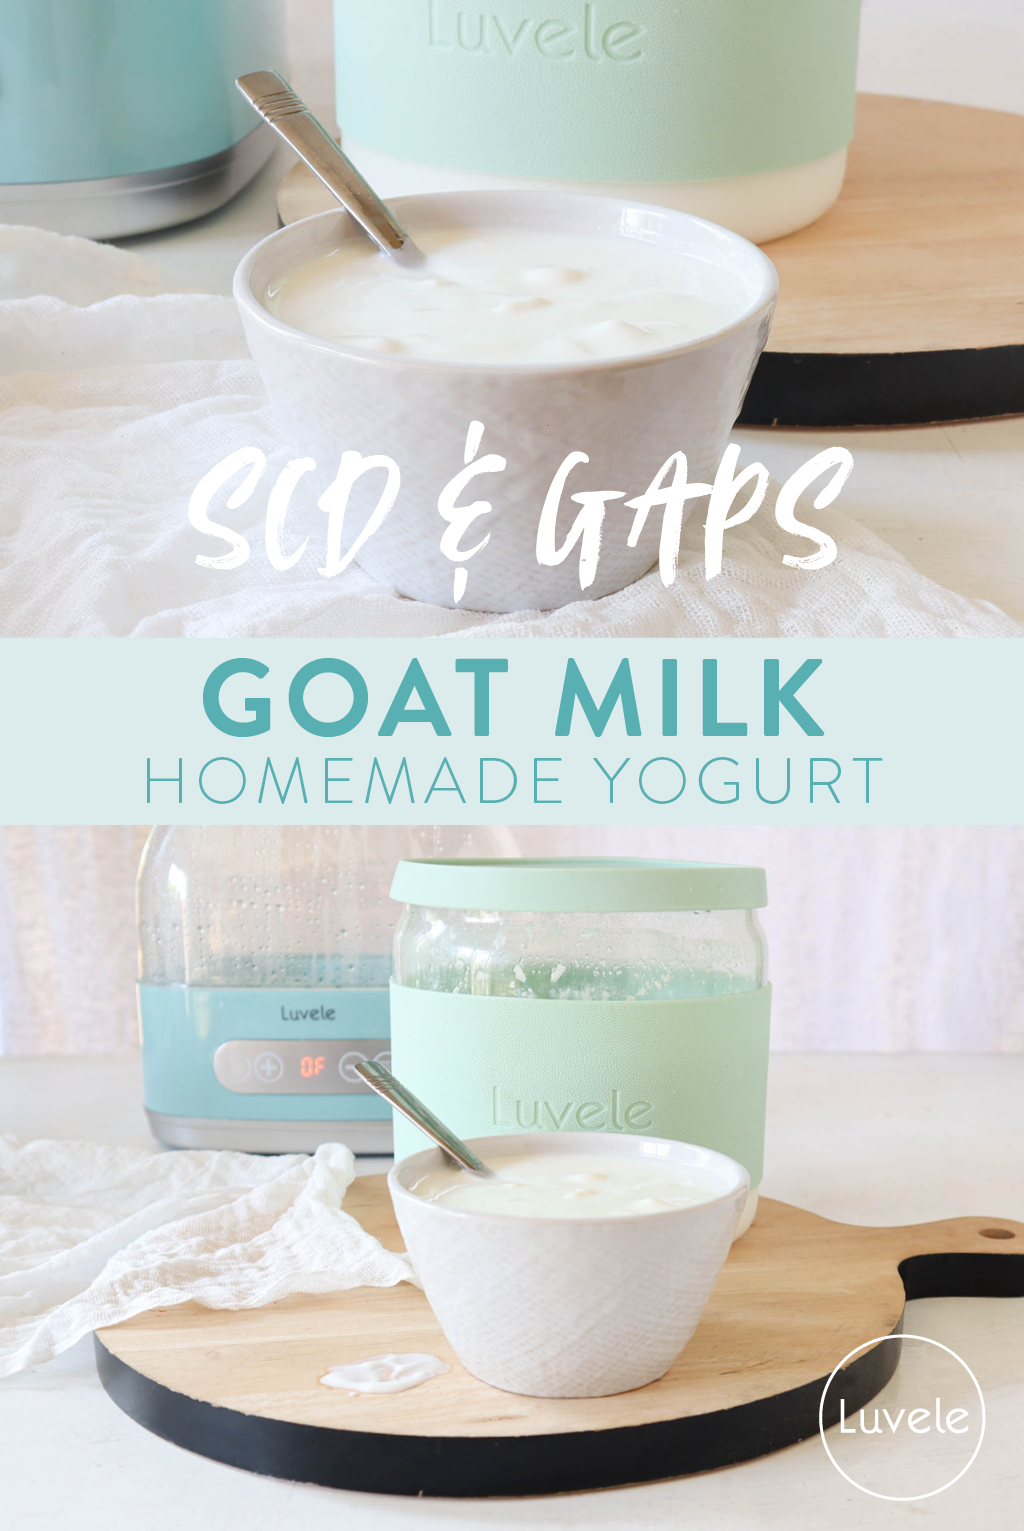
24 hour goat milk yoghurt recipe for SCD & GAPS

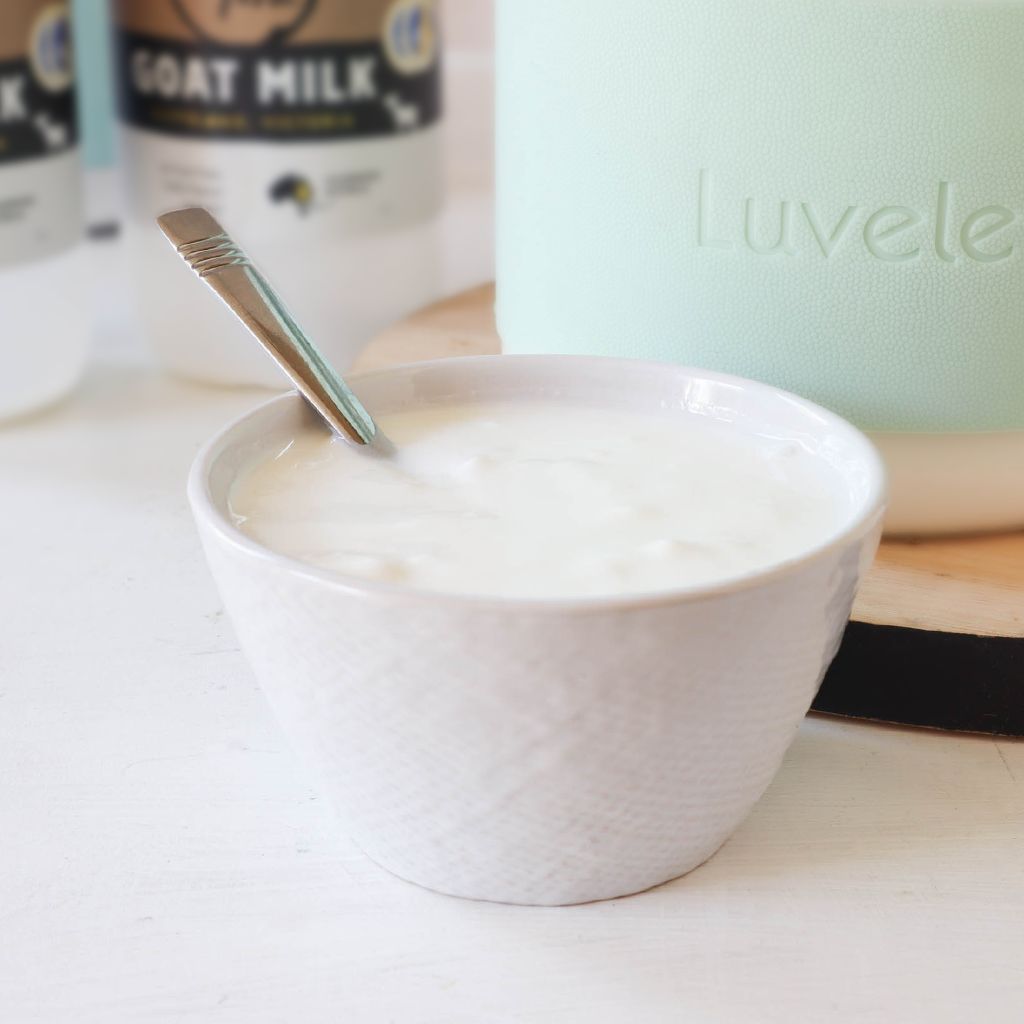
GOAT MILK YOGURT - A GENTLE ALTERNATIVE.
People who are sensitive or intolerant to cow’s milk often find goat milk more easily digestible. Goat milk is close in structure to human milk, so it is no surprise that people tolerate it well. Goat milk is also the preferred dairy milk used to make homemade 24-hour yogurt on GAPS and SCD gut healing diets.
There are several differences between cow and goat milk but the most significant are the proteins and fats. Most people who are aware of dairy sensitivities are consuming milk from cows that produce the protein A1 casein, which can be inflammatory and hard to digest. Goat milk contains A2 casein and different fats that are easier to break down and digest. A2 casein is also found in sheep and camels milk. In Australia, we are also lucky enough to have A2 cow milk available.
TROUBLE SHOOTING GOAT MILK YOGURT
Making perfectly set cow milk yogurt is failsafe in the Luvele yogurt makers but goat milk yogurt can be a bit trickier. The different composition of fat and protein in goat milk results in a runnier yogurt. If a probiotic rich, fermented food is all you are after, then you will not mind the naturally thin drinking yogurt consistency of homemade goat milk yogurt. If thick and creamy yogurt is more desirable, we have 2 extra steps in the method that make all the difference.
HEATING GOAT MILK
The process for making homemade 24-hour goat yoghurt is similar to cow milk yogurt except that you must be extra careful when heating the milk. We found that goat milk that had boiled produced a runnier yogurt than milk that only heated to approx. 85 C ° /185 F°. A thermometer is essential.
HOLDING THE TEMPERATURE (Optional step)
Heating goat milk denatures the proteins so, holding the temperature for a longer time, produces a firmer yogurt. Holding the milk at around 85 C ° /185 F° for 20 - 30 minutes is ideal but it’s a complicated and stressful task to prevent it from scorching or boiling. The double boiler method works well as the boiling water is a barrier from direct heat.
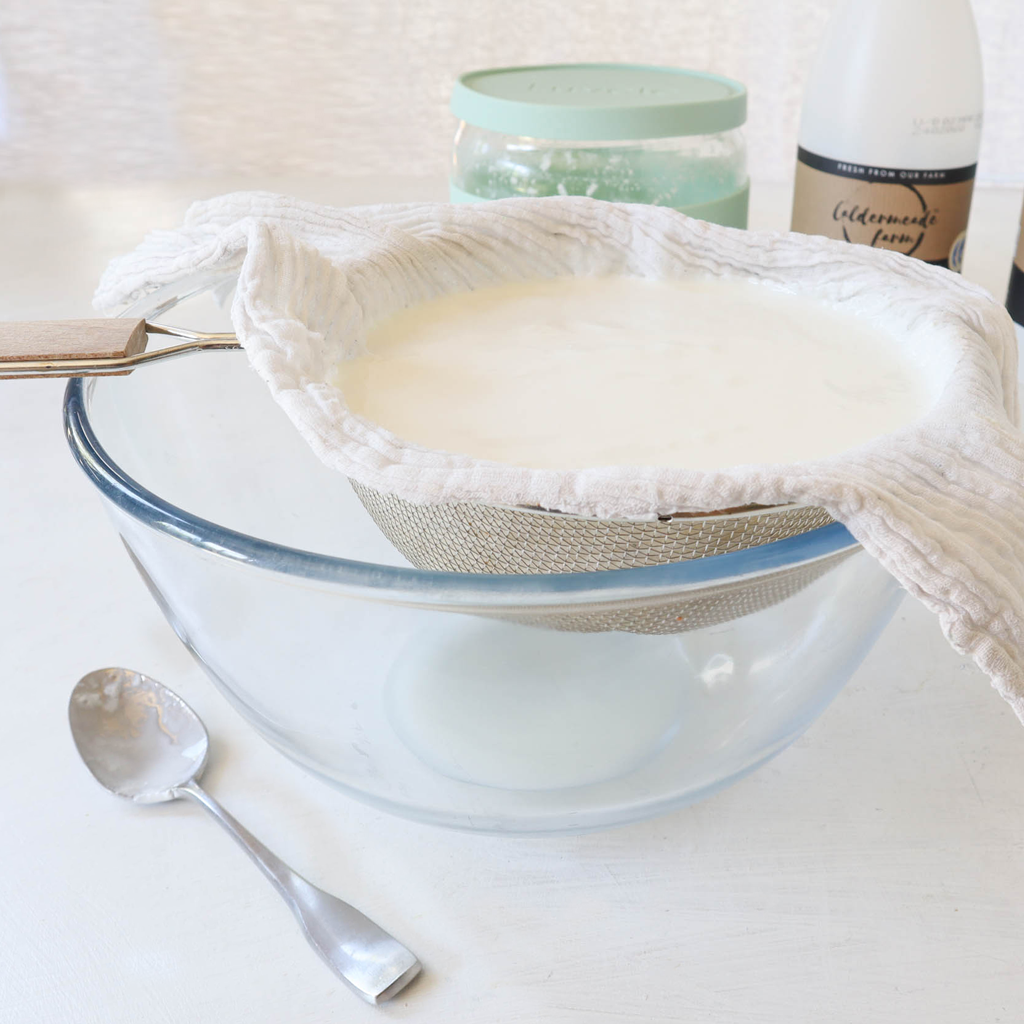
STRAINING THE YOGURT (Optional step)
Straining goat yogurt after it has chilled removes some of the whey, leaving the fats and proteins behind. The longer the yogurt is strained, the thicker the yogurt will become. We strained our goat milk yogurt for 2 hours. You might also like to try straining the yogurt overnight to make goat milk labneh cheese.
WATCH HOW TO MAKE GOAT MILK YOGURT HERE
INGREDIENTS
Goat milk - enough to fill capacity of yogurt maker jar
Yogurt starter culture
PREPARATION
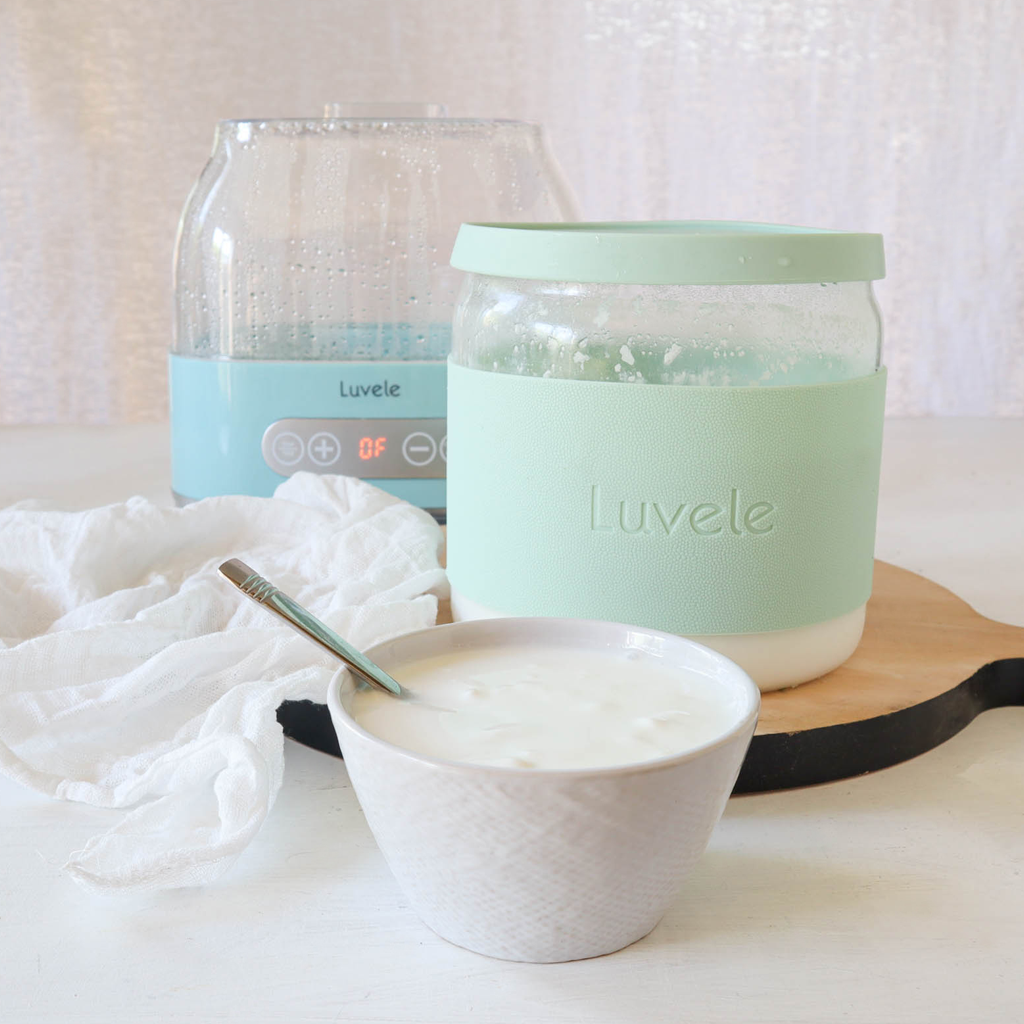
Before you begin it is important to sterilise the Luvele yogurt making glass jar, lid and any utensils you use, in boiling hot water. The danger of not sterilising is that other bacteria may overpower your culture and affect the quality of your yogurt.
METHOD
1. Select two large saucepans that can sit into one another in a double boiler fashion.
2. Measure the appropriate quantity of goat milk to fill your Luvele yoghurt maker glass jar and pour into the smaller of the two saucepans.
3. Heat the milk slowly on a low heat to reach 185° F (85° C). Goat milk is delicate and must not boil. Stir once or twice to stop the milk sticking to the bottom.
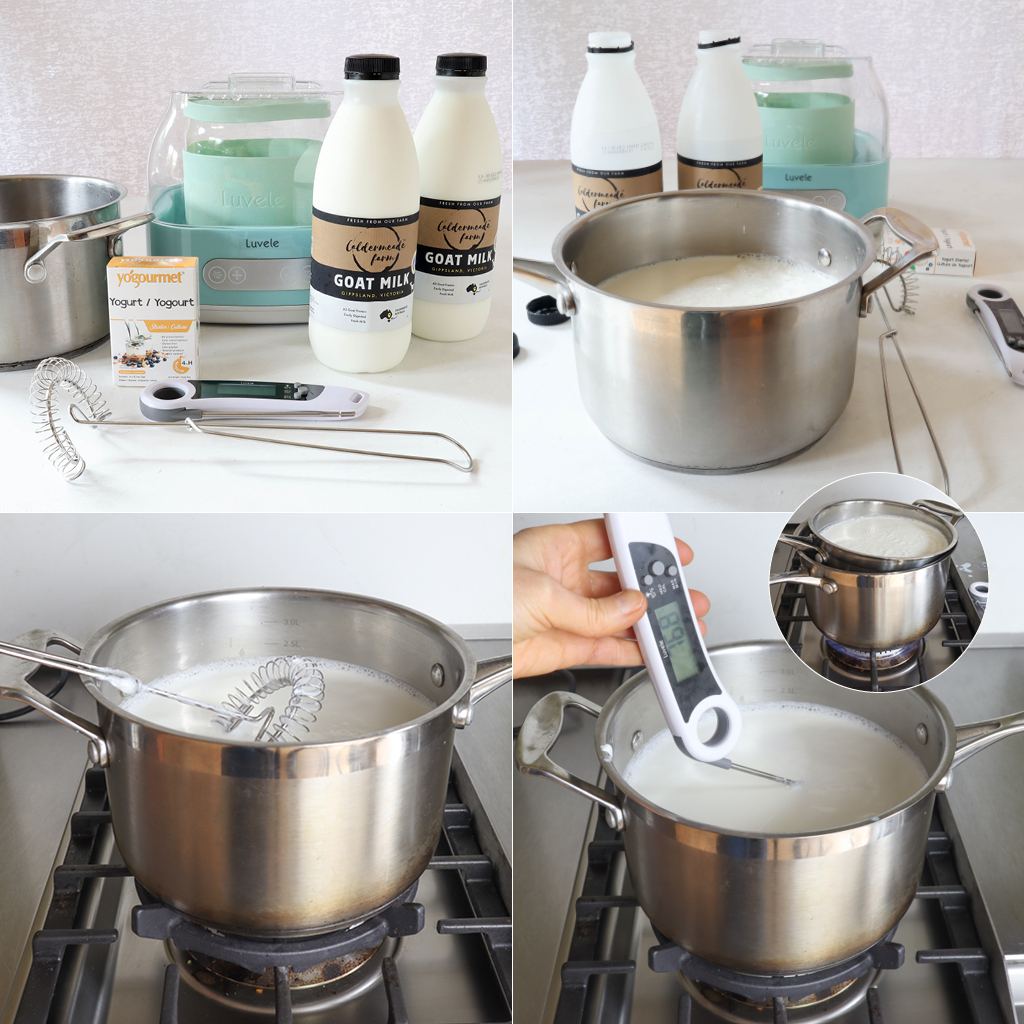
4. Fill the larger saucepan with approx. 2 inches of boiling water
5. Once the goat milk has reached 85 C ° /185 F° place the saucepan of milk into the pot of boiling water and continuing heating for 20-30 minute. You will still need to use the thermometer to monitor the temperature.
6. Remove the hot milk from the stove-top and leave to cool to below 110° F (43° C)
7. The milk can cool down to below 43°C, it just mustn't be too hot when adding yogurt starter culture. Temperatures above 43° C will kill the good bacteria.

8. Pour the milk into the yogurt making glass bowl.
9. Add the starter culture and gently whisk it in.
10. The milk is now ready to begin fermentation. Put the lid firmly on the glass yogurt jar and place into your yogurt maker. Pour water slowly into the base. The water must not be filled over the ‘tall line’ indicated on the inside wall of the maker.
11. Place the cover lid on top. Use the digital control panel to set the temperature to 38° C, the time to 24 hours and then press ‘confirm’ to begin incubation.
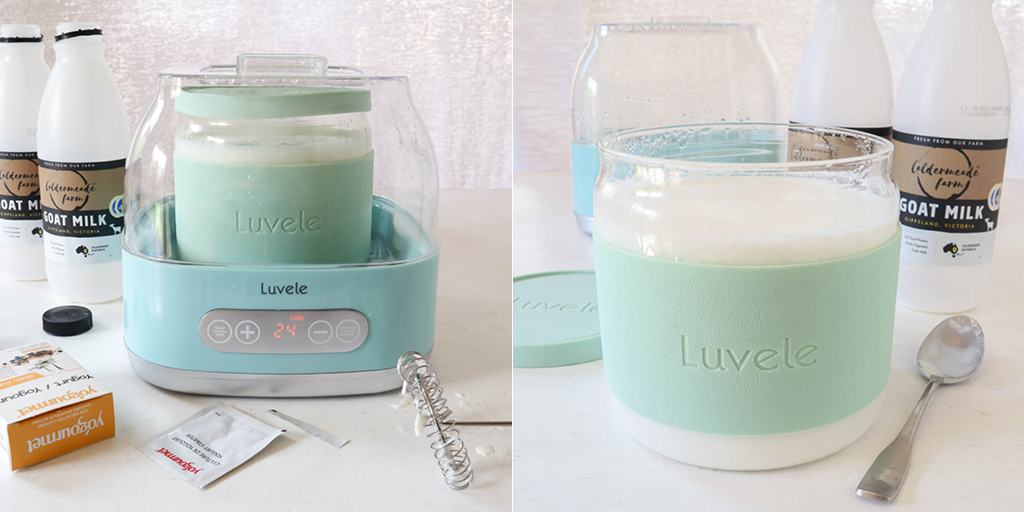
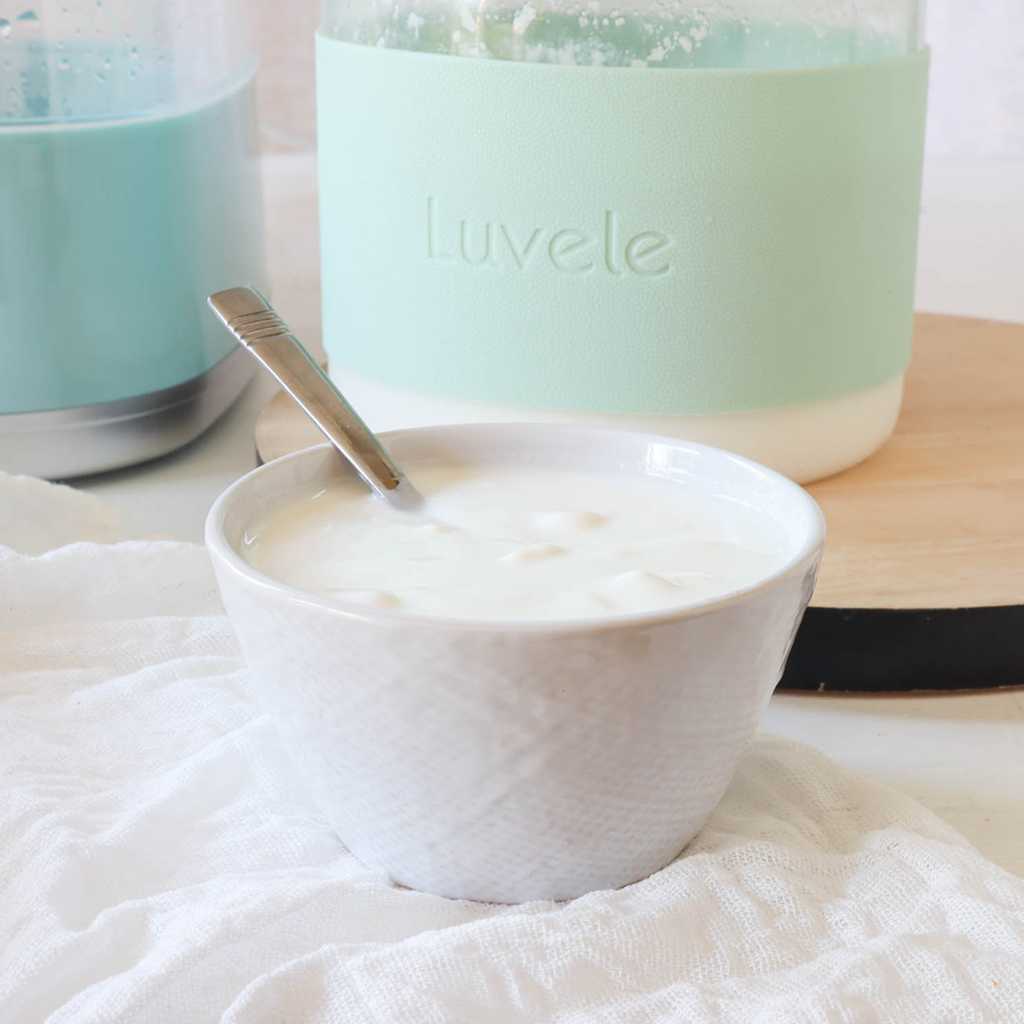
12. After 24 hours the fermentation is complete. Remove the yogurt maker lid and gently lift out the glass bowl. Straight from the cooker the goat yogurt will be warm and runny. Be gentle with the yogurt and don’t stir it or else it won’t set in a perfect white mass.
13. Place the jar of yogurt in the fridge for at least 6 hours to set.
14. When the goat milk yogurt has chilled you may want to strain some of the whey out of it to thicken it up.
15. Strain the yogurt through a muslin cheese cloth over a sieve to remove the whey. Note: Do not use a nut milk bag. Goat milk yogurt is very thin and will drain through the fabric of some varieties of nut milk bags.
16. Place the yogurt in the fridge and let strain for two hours minimum. You can drip for longer. There are lots of beneficial ways to use whey so don’t through it away.
17. Scoop the dripped goat yogurt back into a clean yogurt jar and keep in the fridge.
You might also like to try straining the yogurt overnight to make goat milk labneh cheese.
PIN THIS RECIPE
BUY YOUR STARTER CULTURE HERE


Item is added to cart